webpack-神奇的前端工具
webpack只是工具不涉及浏览器兼容
最早接触webpack是15年初,那时候也写了几个dome,去年的文章 但是有模块化的没模块的组合,不知道怎么处理,但是RJS可以处理各种有模块化,没模块化的,就一直用的RJS。废话不多话,开始介绍webpack webpack的基本使用很容易,只要你按照commonjs规范些,commonjs规范是啥的,我觉得其实就是写完一段代码,把要暴露的变量挂载到exports上 例如 //a.js
var a = "你好";
module.exports = a;
//b.js
var a = require('a.js');
console.log(a)//你好
对于commonjs规范的和没规范的js文件怎么打包 1、将没有模块化规范的文件和入口文件作为一个数组,没有模块化的放在前面 例如
//zepto是没有模块化的,main是我们的入口js
entry: {
        main: ["./src/js/zepto.js", './src/js/main.js'],
   },
   ...
2、使用exports-loader插件 使用exports会在没有模块定位的文件后面把你写的变量挂载到 module.exports上,这样就成了commonjs规范 安装完exports-loader插件后,配置文件改成
    module: {
      //加载器配置
      loaders: [
          { test: require.resolve('./src/js/zepto.js'), loader: "exports?Zepto" }
      ]
  },
其它地方正常引入zepto 打包后,在文件中你会看到这么一句话
 /*** EXPORTS FROM exports-loader ***/
module.exports = Zepto;
因此使用exports-loader符合webpack的加载思想.
如果想把公共的打个包可以用uglify
npm install uglify-js -g
"uglify": "uglifyjs src/common/jquery.js src/common/handlebars.js src/common/util.js -o js/common/common.js"
公共模块提取
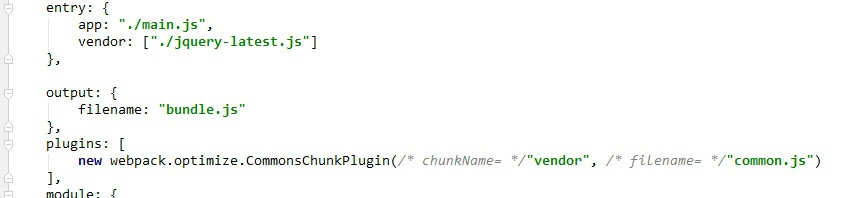
当多个入口文件引入同一个文件的时候,使用CommonsChunkPlugin可以把它们提取出来(这点 很智能)
var commonsPlugin = new webpack.optimize.CommonsChunkPlugin('dist/js/common.js');
module.exports = {
    entry: {
        // main: ["./src/js/zepto.js", './src/js/main.js'],
        main: "./src/js/main.js",
        app: "./src/js/app.js",
    },
    ...
plugins: [
        commonsPlugin
    ],
你也可以通过配置把它们拿出来
webpack 加载css也很容易
require('style.css')//和加载js一样
这样打包之后,css会通过style标签引入在页面上
其实这样也没啥影响,改还是该源文件,可能有的人看起来不爽,好吧,我们和其它打包工具一样,把它导出来
这里要用上extract-text-webpack-plugin插件
var ExtractTextPlugin = require('extract-text-webpack-plugin');
plugins: [
        new ExtractTextPlugin('dist/css/[name].min.css'),//把css作为单独文件导出
    ],
webpack设置banner
plugins: [
        new webpack.BannerPlugin('This file is created by '+ newDate().toLocaleString())//设置文件头
    ],
编译sass 我就不说了 下面来说说按需加载(这个很重要) 这里要用到bundle-loader插件
//第一个lazy表示延迟加载,第二个是模块的名字(不写打包出来的没名字)
var loadlazy = require("bundle?lazy&name=lazy!./lazy.js");
//点击的时候加载
jquery('.test').on('click',function(){
    loadlazy(function(m) {
        console.log(m.get())

    });
})

//在webpack.config.js中
 output: {
        chunkFilename: "dist/js/[name].chunk.js"//延迟加载的模块名字
    },
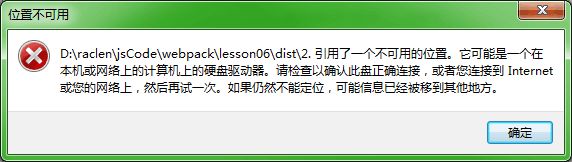
chunkFilename一定要写,不写你打包出来的文件不存在于项目中,不知道在哪,你会看到这样的提示
 最后说一下加载字符串,用模板渲染
这里要用到html-loader
模板文件
最后说一下加载字符串,用模板渲染
这里要用到html-loader
模板文件
//info.html
<div class="">
    <h1>我是标题</h1>
    <ul>
        <li>{{name}}</li>
        <li>{{address}}</li>
    </ul>
</div>
//在main.js这样使用,你也可以使用其它模板
function htmlTpl(tpl, data) {
return tpl.replace(/{{(\w+)}}/g, function() {
return data[arguments[1]];
});
}
var infoTpl = require('../tpl/info.html');
var data = {
name: "<h3>你好</h3>",
address: '湖北襄阳'
}
$('#test_tpl').html(htmlTpl(infoTpl,data));本地服务自动刷新浏览器(webpack-dev-server) 首先安装 npm install webpack-dev-server —save 执行命令 webpack-dev-server —port=3000 —hot —inline 打开localhost:3000 即可访问,改变js文件自动刷新浏览器 —hot和—inline的位置不能颠倒 —hot —inline是一条独立的命令
--content-base <file/directory/url/port>: base path for the content.
--quiet: don’t output anything to the console.
--no-info: suppress boring information.
--colors: add some colors to the output.
--no-colors: don’t use colors in the output.
--compress: use gzip compression.
--host <hostname/ip>: hostname or IP. 0.0.0.0 binds to all hosts.
--port <number>: port.
--inline: embed the webpack-dev-server runtime into the bundle.
--hot: adds the HotModuleReplacementPlugin and switch the server to hot mode. Note: make sure you don’t add HotModuleReplacementPlugin twice.
--hot --inline also adds the webpack/hot/dev-server entry.
--public: overrides the host and port used in --inline mode for the client (useful for a VM or Docker).
--lazy: no watching, compiles on request (cannot be combined with --hot).
--https: serves webpack-dev-server over HTTPS Protocol. Includes a self-signed certificate that is used when serving the requests.
--cert, --cacert, --key: Paths the certificate files.
--open: opens the url in default browser (for webpack-dev-server versions > 2.0).
--history-api-fallback: enables support for history API fallback.
因为命令太长,我们优化一下 在package.json里面写上
"scripts": {
    "start-server":"webpack-dev-server --port=3000 --hot --inline"
  },
我们就可以使用 npm run start-server 来执行这条命令了
tips:
- 使用webpack-dev-server 编译后的文件存内存中,本地看不到,仅作为调试用
- 在webstorm中会有失效的情况,需要设置一下(将System Setting - safe write勾掉就好)
相关链接 webpack指南 一小时包教会 —— webpack 入门指南 webpack工具迁移 webpack expose-loader exports-loader区别 webpack从开发到上线 用UglifyJS2合并压缩混淆JS代码
评论
无需注册,填写昵称即可评论 · 阅读 — 次